
How to Fix Sticky Buttons on PS4 Controller(Only 7 Steps)
The controller of the PlayStation4 is like the driving wheel of your whole gaming setup. So, you will always want it to be in the best condition to assist you in performing well while playing games with it. But things can become really irritating when the buttons of this PS4 controller get sticky.
You will have to solve this issue as early as possible, and knowing how to fix sticky buttons on ps4 controller is a must in this case. However, the process is not much of a challenging task to perform if you follow the guidelines correctly.
Read More: How to fix headphone jack on Xbox one controller (5 Ways)?
The Possible Reasons Why the PS4 Controller Buttons can Get Sticky
Suppose you are playing games on your PS4, and suddenly you are feeling difficulties in pressing the controller button. In most cases, it happens if the buttons somehow become sticky.
There are numerous reasons why the buttons of the PS4 controller can get sticky. Some possible reasons are:
- When you start playing games with the controller without washing your hands, dirt can enter into the controller and make the buttons sticky
- If you eat foods during the game, foods can also enter there to make the buttons of the controller sticky
- Keeping the controller in the dirty places where dirt and debris can enter is also another reason for this button sticking issue
The Necessities of Fixing the Sticky Buttons on PS4 Controller
It is really irritating when the buttons of the PS4 controller get sticky for some reason. In this situation, your gaming performance can get affected pretty much. As a result, you need to fix those sticky buttons as early as possible.
There are some more interesting reasons why you should fix the buttons, and those are:
- Keeping the buttons sticky for a more extended period can make the whole controller damaged permanently, and that’s why fixing those buttons are crucial
- To improve your gaming performance compared to the time when buttons of the controller were sticky
- For avoiding the internal short-circuit of the controller, which can be caused by the dirt which made the buttons sticky
How to Fix Sticky Buttons on PS4 Controller – The Step-by-Step Process that You Should Follow

The sticky options button or other buttons of your PS4 controller are never expected for you as a gamer. That’s why you will have to step up for fixing this issue to save your entire controller. Though the process is not that much tough, following the wrong procedure can make it really painful for you.
So, keep your head cool, and follow the described instructions step-by-step below to get your job done correctly:
Step-1: Collect the Necessary Materials for Fixing the Controller Buttons
Before you start fixing the buttons, you will have to collect the necessary materials. Without those, it isn’t possible to fix the controller buttons. So, you need to arrange all the required materials and keep them aside, so you can use them whenever necessary. Those materials are:
- The Air Duster
- Microfiber Cloth or Towel
- The Q-tips or Cotton Balls
- Rubbing Alcohol
- A medium-sized bowl
- Toothpick
- Screwdrivers
Step-2: Prepare the PS4 Controller for Fixing
You can just start fixing the controller right after gathering the necessary materials. After placing the materials in a place where you easily access those, you need to prepare the controller. First, you will have to turn the PS4 off and unplug all the cables that are connected with the PS4 controller.
As a result, there will be no risk of any accidental damage happening while you fix the sticky buttons. It will also make the working surface clean to get things going correctly. Then you need to hold the PlayStation controller upside down.
At the same time, you also need to ensure that all the controller buttons are pushed in. By doing so, you will be able to access easily everything inside to fix the buttons. Before you start fixing the buttons, don’t forget to wash your hands and wear a pair of gloves for both safety and cleanliness.
Learn More: Can You SLI Two Different Graphics Cards?
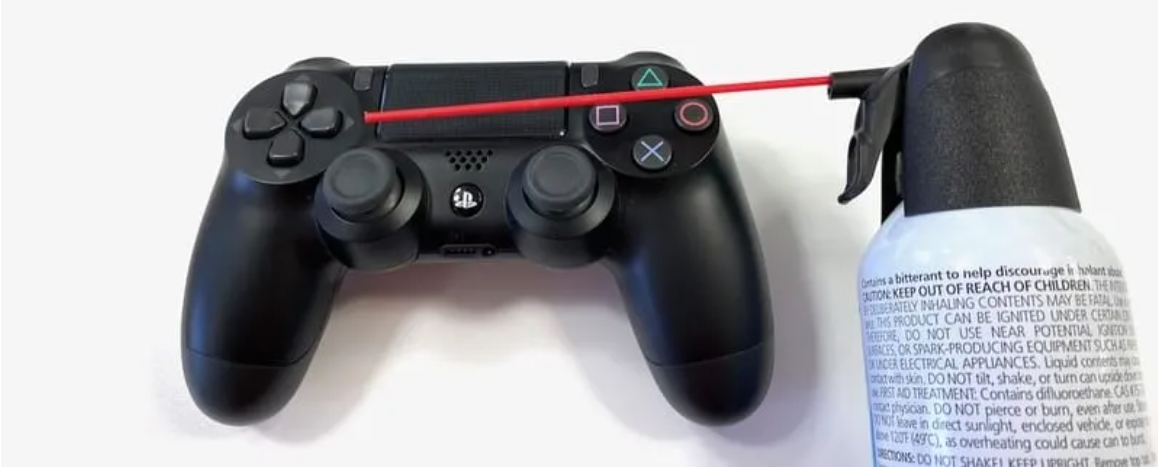
Step-3: Blow Dust and Debris Off Around Controller with Compressed Air
Take the air duster in one hand and the controller in the other hand, or you can take someone’s help in this matter. First, use the compressed air in it to blow the dust and debris off around the buttons of the controller.
Then, with the thin pipe of air duster, blow air in the empty areas beside the buttons where dust and debris normally gather. As a result, the compressed air will blow off all the dust and debris from the sides and side holes of the controller buttons.
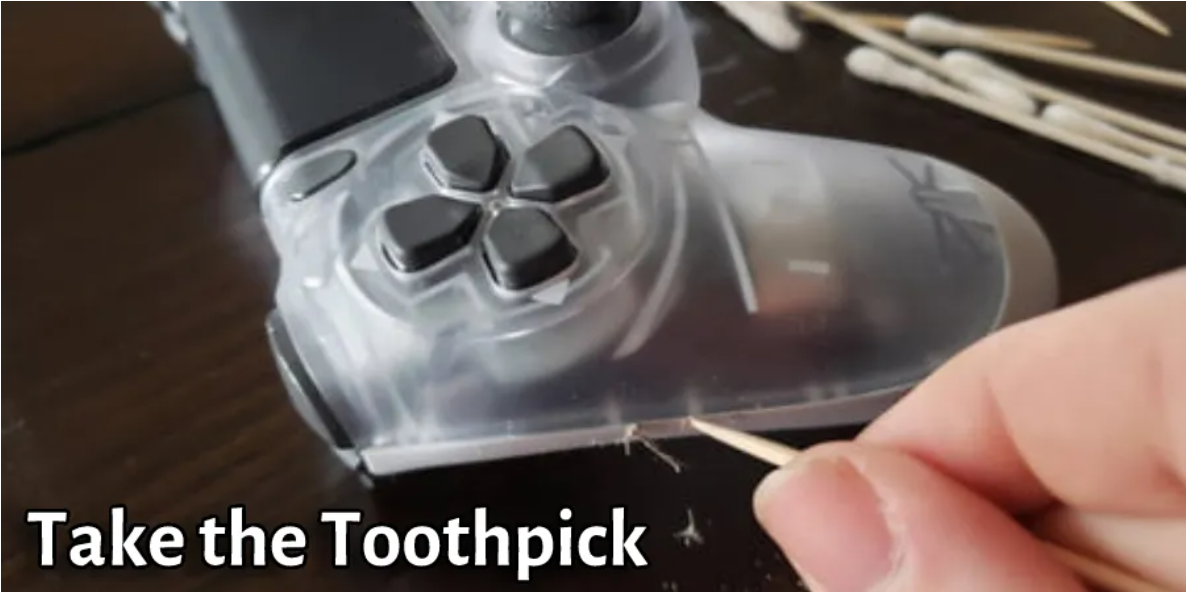
Step-4: Eliminate the Hard Dust from Each Side of the Buttons with the Toothpick
Now it is the turn for the toothpick to use for eliminating the dust that was left even after blowing the air duster. Use the toothpick carefully to remove all the hard particles that were still inside the side holes of the buttons.
While doing so, you will have to be extra careful about not hampering the buttons or controller body with the toothpick. Perform it with all the buttons of the controller, even if all of those are not sticky except the L-trigger.
Step-5: Clean the Inside of the Controller with Rubbing Alcohol
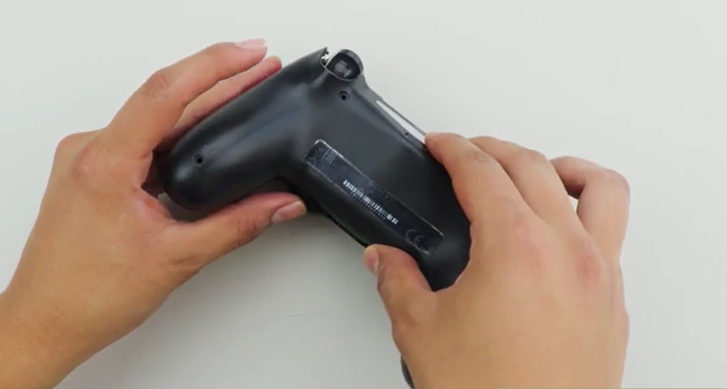
After fixing the outside of the controller buttons, it is time to clean the inside if something in there is making the buttons sticky. You will have to dismantle the whole controller to clean the inside section. At first, flip the controller, and you will find four screws placed to attach the two plastic sections of the controller.
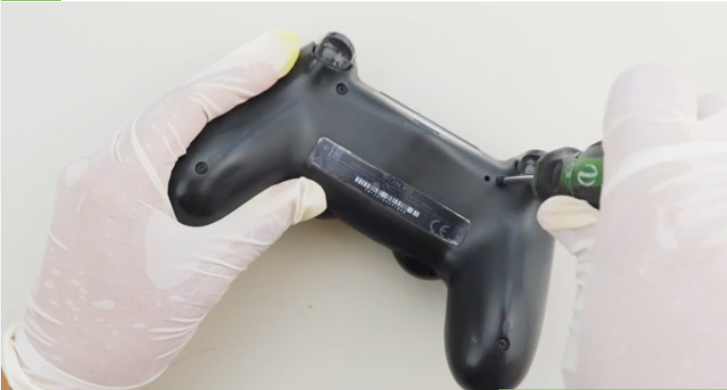
With a screwdriver, remove all those screws from their respective places. Now, as you have removed all the screws, it is time to open up the controller body. Again, you will require a flathead screwdriver for the task, and you will have to be gentle when levering open it.
Right after that, when you loosen the back part, you will find a white ribbon in the connector slot. Gently detach the ribbon from there, and remove the back piece of the controller carefully. Next, remove the battery and the chipboard from the controller, along with detaching apart both parts of the controller.
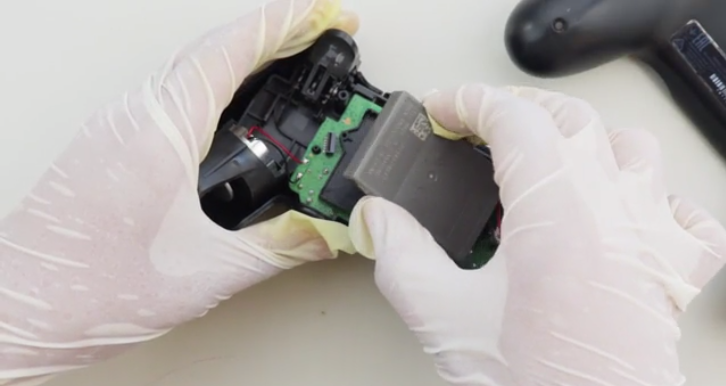
Keep the battery and the chipboard on a clean and safe surface. You will make the inside portion of the controller will be exposed by doing so. The next task for you is to remove all the buttons, even the non-sticky ones, and the analog sticks as well. Now it is time for cleaning all the parts, including the buttons and sticks differently.
But you can’t use any liquid to perform the cleaning task of those electronic parts. Because ordinary liquid will damage those electronic particles. That’s why the rubbing alcohol is perfect for this cleaning task, as it won’t damage the buttons, sticks, and other parts.
You Should Know it Are curved monitors better for your eyes?
All you need to do is make a mixture of one portion of water and one portion of rubbing alcohol or also known as isopropyl alcohol. Pour the alcohol mixture into a medium-sized bowl that you kept aside, and then wet the cotton balls into it.
You can also use baby wipes to scrub the dirty ps button and the other controller particles. When the cotton balls absorb the alcohol mixture well enough, use it to scrub all the electronic particles differently.
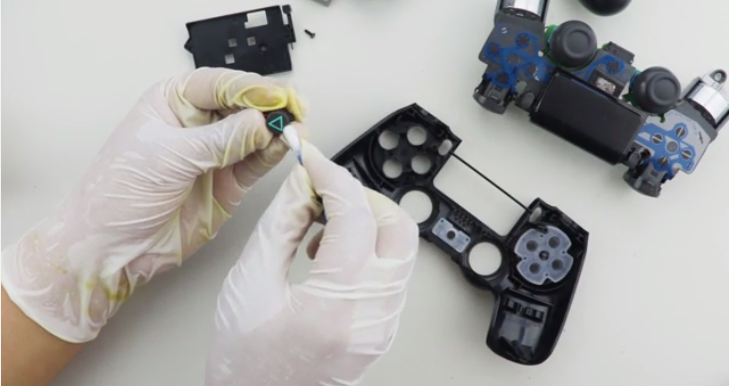
While scrubbing with alcohol, ensure no dust or debris is left in any section of those controller parts, including the buttons and sticks. When you are done cleaning those parts, you need to dry them as well. Use the microfiber towel to rub those parts, and keep them on a clean surface for at least 8-10 minutes.
Then again, rub those parts with a dry microfiber cloth or towel for the final part of the drying process. Hopefully, there will be no dirt and debris left in anywhere of the controller to make the buttons sticky. If the buttons are somehow damaged, you may need to replace those.
Step-6: Reassemble All the Parts of the PS4 Controller
When the cleaning and rubbing tasks are done, you need to reassemble all the parts together. First, put all the buttons and sticks in their respective places along with the battery and chipboard. After doing so, connect the white ribbon into the connector slot.
Then take the detached back part and place it with the other part of the controller body. The next task for you is to put those four screws in their places and tighten them up with the screwdriver.
Step-7: Check Whether the Buttons are Working Properly or Not
After reassembling the dismantled controller, you need to check whether the buttons are still sticky or not. Next, take the controller and put it upside down once again to have a clear view of the inside section. Then it will be easier for you to look whether any dirt or debris is still in there or not.
If there is no dirt and debris left beside the buttons, they won’t remain stuck, and you will be able to operate them properly. After physical checking of the PlayStation controller buttons, you need to check whether the buttons are performing well while gaming.
So, connect the controller with your PS4 and open a game through it on your computer. Then check the response of the buttons which got stuck earlier. Hopefully, there won’t be any sticking issue with the buttons anymore, and accessing the controller will be much more responsive than before.
Frequently Asked Questions
Can the PlayStation controller button get permanently damaged after getting stuck somehow?
The buttons of your PS4 controller can get stuck out of nowhere and prevent you from pressing those. You need to fix those sticky buttons as early as you can by applying the fixing methods. But if you keep those buttons sticky for a longer period without fixing them, those can get permanently damaged.
If that happens, replacing those buttons may become a necessity, and even in some cases, you may need to buy a new controller.
What can I do to prevent the buttons of my PlayStation controller from getting sticky?
Prevention is better than cure, and some simple precautions can also reduce your cost in many cases. You can prevent the buttons from getting sticky by following some simple precaution techniques.
Wash your hands before touching the controller, and if you eat often while you are gaming with the controller, you need to reduce it. Along with these, you need to clean the controller regularly to prevent the buttons from getting sticky.
Is it mandatory to dismantle the whole controller to fix its sticky buttons of it?
Dismantling the whole PS4 controller to fix the sticky buttons is not always required. If the buttons get fixed by just blowing off the dust and eliminating the hard dust by the toothpick, then dismantling is not required. But unfortunately, the buttons may not always get fixed with these two simple solutions.
If that happens, then you must dismantle all the parts of the controller to fix the sticky buttons. It will also help in the cause if you need to replace any particles in the controller.
Final Verdict
The period when the PS controller buttons get sticky is never expected under any circumstances. However, if not fixed, the sticky buttons will undoubtedly affect your gaming performance. That’s the reason why the knowledge about how to fix sticky buttons on PS4 controller becomes so much crucial.
The fixing process is easy if you follow the correct procedure step-by-step as described above. If not, this simplest of tasks can give you a headache by turning into a complex one.